

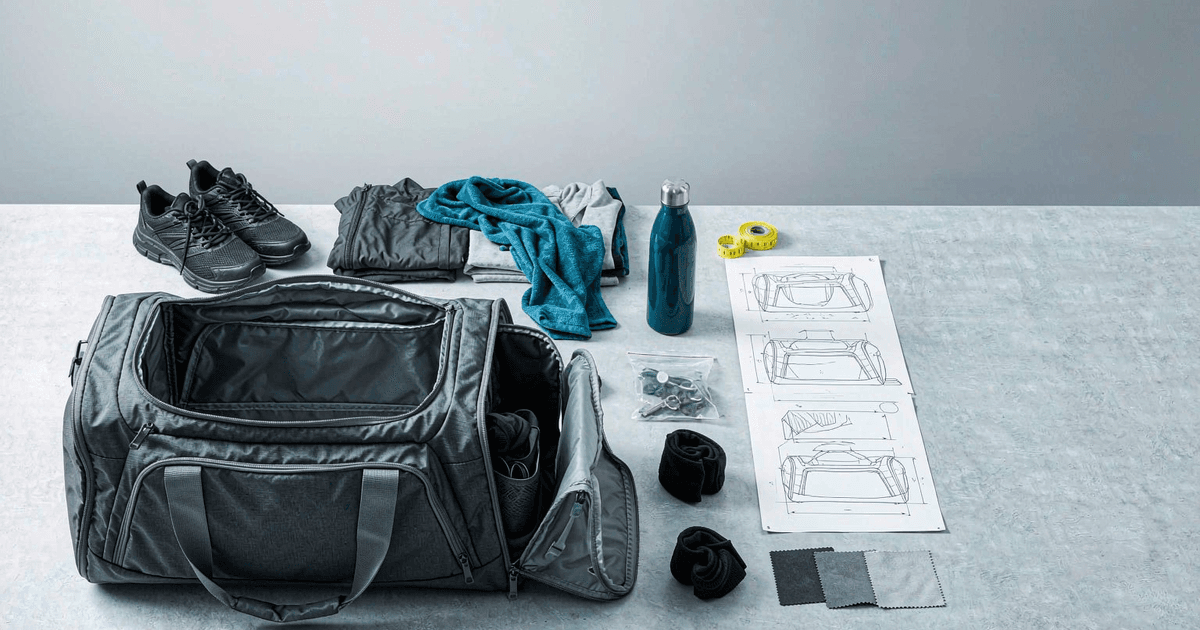
A gym bag size is not one number. It is a relationship between the user's gear, the bag's opening, the space taken by each compartment and the shape that remains after loading.
That is why two bags with similar outside dimensions can work very differently. One may leave most of its body open. Another may divide the same body into a shoe compartment, wet pocket, bottle pocket and valuables section. The second bag can be better organized while offering less usable room in the main compartment.
For a custom project, the useful question is not "Which standard size should we copy?" It is "What must fit, how must the user reach it, and what dimensions allow that layout to work?"
This guide shows product teams how to answer that question before requesting a sample.
Quick Answer: What Size Should a Custom Gym Bag Be?
There is no single size that works for every custom gym bag. For a B2B project, the right size is the smallest exterior envelope that passes four checks with the agreed contents:
- The largest items pass through their intended openings.
- The shoe, wet-item and bottle areas leave enough usable main-compartment space when loaded.
- The filled bag fits the buyer's actual locker, shelf, vehicle, retail carton or other stated limit.
- The bag closes, carries and keeps its intended shape without unacceptable compartment or zipper interference.
Use small, medium and large only as retail labels. Before sampling, record the target contents, their representative dimensions, the required separation, the storage limit and the condition in which the bag will be measured. The first sample should then be checked with that same load. This gives the size decision a repeatable pass/fail basis instead of relying on an unsupported standard-size chart.
Start With a Real Gym Load, Not a Size Label
Small, medium and large are convenient retail labels, but they are weak development inputs. The same label can describe different shapes, openings and internal layouts.
Begin with the load case. List what the target user carries during one realistic session. The gym bag essentials packing guide can help separate the load into clean, used, heavy, fragile and quick-access groups before the bag dimensions are set.
A useful load list includes:
|
Load group |
Examples |
Size question it creates |
|
Footwear |
Training shoes, court shoes or shower sandals |
What length, width and depth must the shoe area accept? |
|
Clothing |
One change of clothes, uniform or layered kit |
How much compressible volume is required? |
|
Towel or wet gear |
Small towel, full towel, swimwear or damp clothing |
Does it need a separate expanding area? |
|
Bottle |
Short wide bottle or tall narrow bottle |
What pocket diameter, depth and retention are required? |
|
Personal items |
Phone, keys, wallet and earphones |
Can small items stay visible and reachable? |
|
Work or travel items |
Laptop, documents or toiletries |
Must they remain separate from used sports gear? |
|
Sport-specific equipment |
Gloves, guards, bands, rope or balls |
Does the item control the bag's shape or opening? |
Mark each item as required, optional or only present in selected use cases. A bag designed around every possible item often becomes larger, heavier and more complicated than the core user needs.
Record representative dimensions for the largest or most awkward items. A shoe, bottle or rigid accessory can set a hard boundary. Soft clothing can compress, but it still needs room around the zipper and other compartments.
Define the Use Scenario Before the Dimensions
The same gear list can lead to different bags depending on where and how it is carried.
A commuter may need the bag to move between home, work and the gym. That can create a need for a separate work zone, a clean exterior and quick access while standing. A club or team bag may carry more equipment and spend more time on benches, floors or vehicles. A studio user may carry fewer items but need a compact bag that fits a cubby. A gym-and-weekend product may need the same body to support both training gear and short-trip clothing.
Write the scenario in one sentence:
target user + main activity + required contents + carrying route + storage environment
For example:
An office commuter carries training shoes, one clothing change, a towel, a bottle and small valuables from work to the gym and home.
That sentence is more useful than "medium gym bag." It tells the product team which contents are mandatory, when the bag is full and which areas need separation.
Storage limits should be treated as buyer inputs, not universal facts. If the bag must fit a specific locker, shelf, vehicle space, retail carton or shipping pack, record the actual available dimensions. Do not assume one gym locker size or one travel limit applies to every market.
Build Dimensions From the Inside Out
Once the load and scenario are clear, arrange the contents before fixing the outside measurements.
Start with the parts that cannot easily change shape:
- Place the footwear in its intended orientation.
- Position the bottle upright or sideways according to the design.
- Add any rigid equipment, electronics or toiletries.
- Allocate the required folded clothing and towel space.
- Place small-item storage where it remains visible.
- Add working clearance for the opening and the user's hand.
This creates the first internal layout. The outside dimensions come later, after allowances for seams, lining, support layers, reinforcement, binding, zippers and panel construction have been considered.
A useful dimension drawing should distinguish:
- Overall exterior length, width and height
- Main-compartment usable dimensions
- Shoe-compartment usable dimensions
- Wet-pocket loaded dimensions
- Bottle-pocket opening and depth
- Laptop or document sleeve dimensions, if applicable
- Opening length and maximum access area
- Handle position and shoulder-strap attachment points
- Packed or folded dimensions for shipping, where relevant
The broader duffel bag sizes guide explains why liters and outside measurements do not prove usable fit. A gym-specific brief goes one step further by showing how footwear, used gear and side compartments compete for the same internal space.
Show How Every Compartment Takes Space From Another
A compartment does not create volume. It divides or redirects the volume already inside the bag.
Shoe compartment
A shoe section may enter from the side or end. When empty, its fabric can lie flat and make the main compartment look spacious. When loaded, the footwear occupies a firm block of space. The drawing and sample should show that loaded shape, not only the empty pocket outline.
Ask whether the footwear sits lengthwise or across the bag. Check whether the opening is wide enough for the sole and whether the shoe shape pushes into the zipper path. If the product line targets more than one footwear range, the buyer should define the intended fit rather than using one sample shoe as a universal standard.
Wet-item area
A fixed wet-item area also expands into the bag unless it has a separate external volume. Its size should follow the intended towel, clothing or swimwear load. It should not be drawn as if the main compartment remains unchanged when the wet area is full.
A separate wet-pocket specification should cover position, opening, lining and performance boundaries. At the whole-bag level, the size question is simpler: what loaded shape does the wet area create, and what clean space remains after it is filled?
Brands developing this layout can review the wider custom gym bags range before deciding whether the wet area belongs inside the main body or in a separate section.
Bottle pocket
A bottle pocket must be deep and wide enough for the selected bottle, yet its location also affects the bag body. An internal bottle sleeve uses main-compartment space. An external pocket can change the overall width and may affect how the bag sits beside another item or inside a storage space.
Review removal as well as fit. A bottle can fit inside a pocket but still be difficult to grip when the main bag is full.
Valuables and accessory pockets
Small pockets need less volume, but poor placement can make them hard to use. A flat pocket behind a heavily loaded panel may become tight. A top pocket can be easy to reach but may collide with the main opening. A pocket placed too deep can recreate the problem it was meant to solve.
Use the actual small items or size-accurate substitutes during sampling. Visibility and finger access matter as much as the pocket's flat dimensions.
Select the Opening Around the Loaded Bag
The opening controls whether the stated capacity is usable.
A long U-shaped zipper can expose more of the main compartment and make shoes or clothing easier to place. It also changes the top-panel construction and the way pockets can be positioned around the opening.
A straight top zipper can support a simpler silhouette, but large or rigid items may be difficult to insert if the opening is shorter than the widest useful space inside. A side or end access point can serve a shoe compartment without opening the main bag. A clamshell direction can improve visibility, although the bag needs enough surrounding space to open as intended.
Check the opening under the expected load:
- Can the largest item pass through without being forced?
- Can the user reach the bottom without removing everything above it?
- Do loaded pockets press against the zipper tape or corners?
- Does the lining move into the zipper path?
- Can the bag close without crushing the intended contents?
- Does opening one compartment block access to another?
Do not solve an access problem by adding outside volume before checking the zipper path and compartment position. Sometimes the bag has enough space but the opening does not expose it.
Use a Loaded Layout Before Approving Length, Width and Height
A flat drawing should be followed by a loaded layout. This can be a physical arrangement, a marked sketch, a simple mock-up or an early sample, depending on the project stage.
Review the bag in three conditions:
|
Condition |
What it reveals |
|
Empty |
Basic shape, collapsed panels and unused compartment behavior |
|
Core load |
Whether the normal user kit fits and remains accessible |
|
Maximum agreed load |
Where closure, shape and compartment interference begin to change |
The maximum agreed load is not a durability test. It is the upper use case the buyer has chosen for fit and layout review. Formal load, fatigue, zipper-cycle or material testing needs a separate method and acceptance record.
Look at the loaded exterior as well. A bag may meet the drawing when measured empty and become longer, wider or distorted when soft panels are filled. Decide which measurement condition controls the specification and record it.
If a declared liter figure is used for sales, keep it separate from the fit evidence. The user still needs to know what the bag was designed to carry. One volume label cannot describe opening clearance, pocket competition or item shape.
A Real Sample Lesson: Capacity Was Not the Main Problem
In one anonymized sports and gym duffel project, the buyer supplied representative contents for sample review: sports shoes approximately 30 x 20 x 12 cm, a bottle approximately 25 cm high, a towel, a change of clothes and small personal items.
The first loaded sample exposed four problems. The shoes used too much of the main compartment. The bottle-pocket opening was tight. Loaded clothing interfered with part of the main zipper path. Small personal items were difficult to find.
The response was not simply to make the whole bag larger. The main-compartment proportions were adjusted, the side pocket was widened and deepened, the zipper path was revised, and a small independent zip pocket was added. The same representative contents were then used to review fit, access, loaded shape, closure, zipper operation and compartment interference. The buyer confirmed the revised physical sample and structure, and the approved references were used for later production preparation.
This case does not create a standard gym bag size. The shoe and bottle measurements belong to that project. The reusable lesson is the process: load the real contents, identify where space or access fails, revise the affected area and check the same load again.
Write the Size Brief So Suppliers Quote the Same Product
A quotation is difficult to compare when each supplier imagines a different size or internal arrangement.
Use one controlled brief for every candidate:
|
RFQ field |
What to state |
|
Use scenario |
User, activity, carrying route and storage limits |
|
Required contents |
Item list, quantity, representative dimensions and weight where relevant |
|
Overall size direction |
Target exterior length, width and height or allowed envelope |
|
Main compartment |
Required usable area and access priority |
|
Shoe storage |
Intended footwear, orientation, opening and loaded space |
|
Wet-item storage |
Intended load, position and expansion direction |
|
Bottle storage |
Bottle dimensions, orientation and retention direction |
|
Small-item storage |
Required items, visibility and access order |
|
Opening |
Main zipper path and separate access points |
|
Carrying |
Handles, shoulder strap or other approved carry direction |
|
Materials |
Outer, lining and support direction to evaluate |
|
Branding |
Artwork, location, size and preferred method |
|
Packaging |
Folded shape, individual packing, labels and carton requirements |
|
Quantity and variants |
Total quantity plus size, color, logo and packaging splits |
|
Approval |
Sample questions, controlling files and any defined test requirements |
Mark dimensions as target, maximum, minimum or reference. A number without its role can create the wrong assumption.
Also identify the revision used for the quote. If the shoe compartment, overall dimensions or packaging changes later, ask for the affected quotation scope and drawing to be updated rather than relying on a message thread.
What to Check on the First Gym Bag Sample
The first sample should answer fit, access and layout questions with the representative load in place.
- Measure the exterior under the agreed condition.
- Load the footwear, clothing, towel, bottle and small items.
- Check that the largest items pass through their openings.
- Confirm how much main-compartment space remains after side areas are filled.
- Open and close every zipper with the bag loaded.
- Check whether pockets, dividers or lining interfere with the zipper path.
- Remove frequent-use items without emptying the bag.
- Carry the sample in the intended orientation and observe obvious imbalance or distortion.
- Place it in the actual locker, shelf, retail carton or other stated space when that fit matters.
- Record each issue against the drawing, specification and sample reference.
The custom bag sample approval checklist explains how dimensions, materials, stitching, zippers, pockets, logo and packaging can be recorded with the approved physical reference before production preparation.
Ordinary loaded review does not prove load capacity, long-term durability, waterproofing or zipper life. If the project needs one of those results, define a separate test object, method, condition, sample quantity, acceptance criterion and record.
How Pengtour Reviews Custom Gym Bag Size Requirements
Pengtour can evaluate selected sewn sports and gym bag projects from buyer samples, photographs, dimensions, structure notes or a tech pack. The review can cover the intended load, overall dimensions, opening, internal layout, shoe or wet-item areas, bottle and accessory pockets, materials, carrying details, logo, packaging and sample requirements.
Possible structures may include a main compartment, separate shoe or wet-item storage, accessory pockets, bottle storage, adjustable carrying components and selected support or reinforcement directions. Final feasibility depends on the actual contents, dimensions, materials, hardware, attachment structure and project requirements.
Size review should connect the drawing to the loaded sample. Pengtour may compare overall dimensions, usable internal areas, pocket dimensions, opening and closure, loaded fit, access and packaging against the approved project references. Exact tolerances and any performance testing remain project-specific.
To plan the wider development route, review the custom soft bag development options. When the load list, target dimensions, layout and quantity are ready, send the gym bag brief for project review and quotation.
FAQ
Can one gym bag pattern be scaled into small, medium and large sizes?
It can be evaluated, but uniform percentage scaling often gives a poor result. Shoes, bottles, zipper pullers and hardware do not shrink in the same proportion as the bag body. Each size should be checked against its own target load, opening and compartment dimensions. Shared materials and design language may remain consistent while the internal layout changes by size.
Should handles and shoulder straps be included in the stated bag dimensions?
State both the bag-body dimensions and any overall measurement that includes fixed protruding parts when that difference matters for packaging or storage. Adjustable or removable straps should be specified separately by length range and attachment position. The measurement method should be written into the drawing rather than left to interpretation.
When does a size change require another physical sample?
Another sample is usually worth evaluating when the change affects overall proportions, opening access, loaded fit, compartment size, zipper path, carrying balance, packaging fit or another approved function. A minor document correction may use a different approval route if the buyer accepts it. Record which sample and document revision controls the next stage.
Can different size variants share one quotation and MOQ?
They can be reviewed as one product programme, but each size may change material consumption, pattern work, components, packaging and production planning. Send the total quantity and the split by size, color, logo and packaging. The quotation should show which inputs are shared and which are treated as separate variants. MOQ is confirmed for the actual material and variant plan rather than assumed from the combined total.
Key Takeaways
- Start with the actual gym load and use scenario, not a small, medium or large label.
- Build the internal arrangement around the hardest-to-fit items before fixing outside dimensions.
- Show shoe, wet-item and bottle areas in their loaded state because they take space from the main compartment.
- Check the opening as carefully as the volume. A large interior can still be difficult to use.
- Review empty, normal-load and maximum-agreed-load conditions without calling ordinary use checks formal performance tests.
- Use the same contents before and after a sample revision so the team can see whether the actual problem was solved.
- Keep exterior dimensions, usable internal dimensions, compartment dimensions and measurement conditions in the controlled brief.