

When a portable ultrasound kit needs a carrying case, the first step is not choosing a shell color or asking for a standard size. Start with the equipment set and the way people will carry and use it. A useful brief should show what must travel together, what needs quick access, how the parts should be held inside the case, and what the first sample must prove.
This ultrasound equipment carrying case checklist is for product managers, buyers, engineers, and field teams preparing a custom case project. It covers equipment and accessory inventory, fit, internal organization, opening and carrying workflow, and sample review. It does not replace medical, regulatory, clinical, or laboratory advice.
What an ultrasound equipment carrying case checklist should cover
A checklist should connect the equipment to the carrying task. It should answer five practical questions:
- What equipment and accessories need to travel together?
- What dimensions, connectors, protrusions, and removal paths must the case accommodate?
- How will the user open, carry, and access the kit in the field?
- Which internal supports or pockets will keep the set organized for that use?
- What will the buyer check on the first physical sample?
The case brief can mention protection and organization, but it should not turn a carrying case into a medical device or imply a compliance or performance result that has not been separately verified.
Start with the complete equipment and accessory inventory
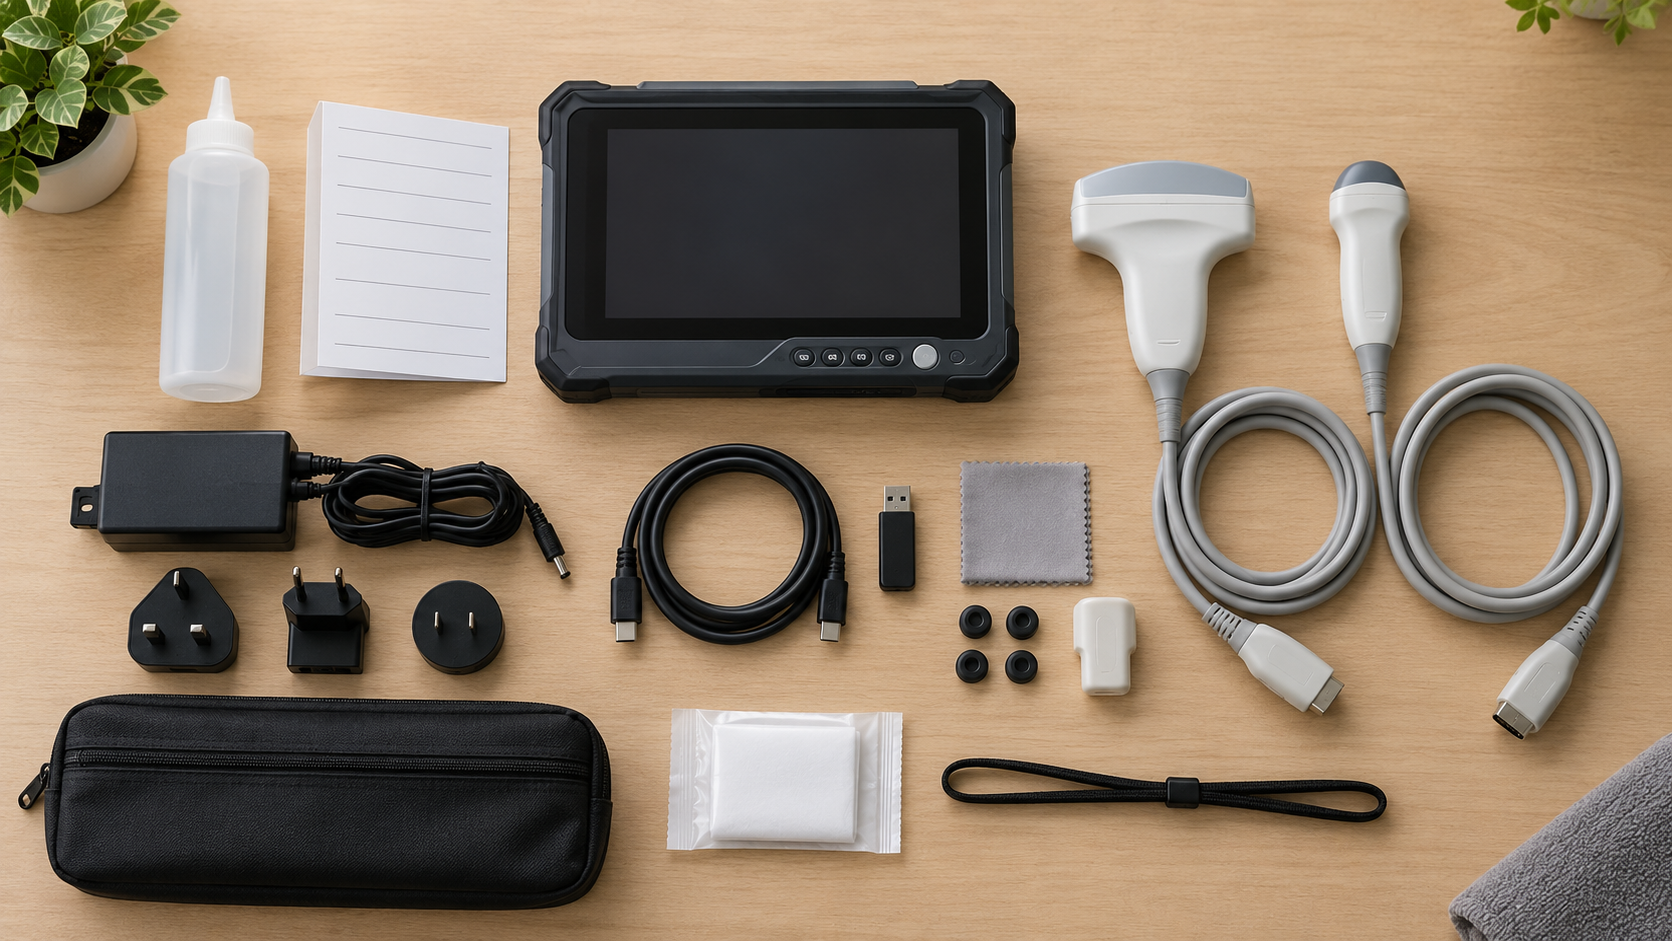
Many fit problems begin with an incomplete list. A case is sized around the main device, then the probes, cables, charger, or smaller accessories are added later. That usually forces a change to the layout, the outside dimensions, or the opening.
Write the inventory before choosing the interior. Mark each item as must-carry, optional, or project-dependent. Add a note about who uses it and when it is needed. A sales team that opens the probe compartment several times during a visit has a different access requirement from a service team that carries a complete kit between locations.
Record the device body, probes, and connections
For the main unit and each probe or sensor, record the actual dimensions and the orientation in which the item should sit. Include handles, screens, knobs, connectors, removable covers, cable exits, and any part that projects beyond the main body.
The list should also identify items that cannot be bent, pressed, or placed under another component. Do not rely on a product name as a substitute for measurements. Different configurations can change the space needed around a connector or cable.
For each item, capture:
- length, width, and height;
- protrusions and connector positions;
- preferred orientation;
- cable direction and minimum removal path;
- parts that stay attached during transport;
- parts that need a separate pocket or retention point.
This information gives a case designer something specific to review. Exact clearances still need to be confirmed against the real product, drawing, or approved sample.
Separate must-carry items from optional accessories
List the charger, power accessories, cables, gel or procedure-related accessories, manuals, adapters, and other items that may travel with the device. Then separate the normal kit from optional additions.
This distinction matters for a portable ultrasound carrying case because optional items can change the interior without changing the main device. A removable divider, pocket, elastic holder, or second layout may be more useful than making the whole case larger for items that are not always carried.
If the kit changes between users or markets, record those variations in the brief. The supplier can then review whether the case needs adjustable organization, separate versions, or a clear rule for what belongs in each layout.
Translate the inventory into fit and internal-organization inputs
Once the list is complete, turn it into a layout discussion. The goal is not to fill every empty space. The goal is to make the intended kit fit, stay organized, and remain accessible for the way it will be used.
For broader fit questions, see Custom EVA Case Dimensions: Fit, Clearance, and Inner Space. It can support the dimensions section of the brief, but the ultrasound kit still needs its own measurements and sample checks.
Check outer dimensions, usable space, and clearance together
Outer dimensions describe the space the case takes up. Usable space describes what the interior can actually hold after the shell, lining, insert, pockets, and hardware are considered. Clearance describes the room needed around an item so it can be inserted, removed, and carried without unwanted interference.
Keep these fields separate in the brief. A smaller outer case may work when the interior is organized around the real equipment. A larger case may still be difficult to use if a connector, zipper path, or divider blocks removal.
Record the measurement source for each critical dimension. A physical product, 3D file, drawing, or revised sample may be needed when the fit is complex. The final values remain project inputs, not generic values that can be copied from another case.
Choose fixed support, foam inserts, or adjustable organization by use case
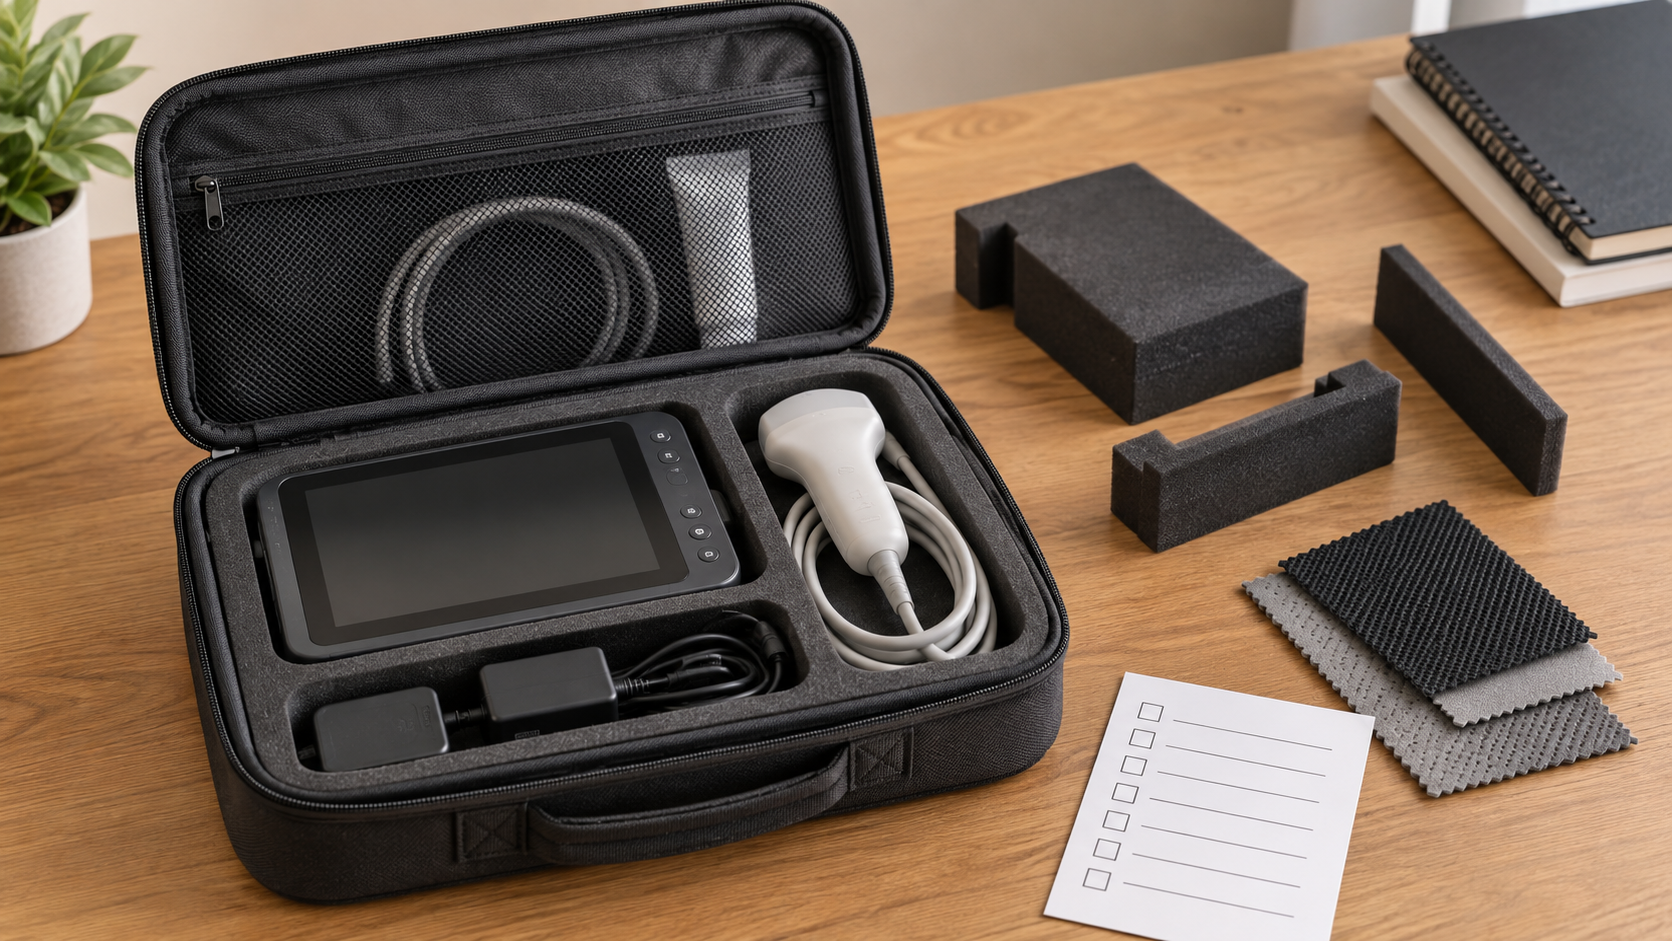
Fixed support can make a repeatable kit easier to position. Foam inserts can create shaped support around selected items. Pockets, dividers, elastic, or other adjustable organization can help when accessories vary or need frequent access.
None of these structures is automatically the best choice. Consider how often the kit changes, how often each item is removed, whether the user needs a clear visual inventory, and whether the case will be sampled with the actual equipment. If a probe is used repeatedly while the main unit stays in the case, access may matter more than maximum packing density.
The insert and interior should be reviewed with the equipment, rather than as an empty pattern. EVA Foam Insert Selection for Custom Products can provide general context for the insert discussion, while this project still needs an ultrasound-specific layout.
Plan the opening and carrying workflow before sampling
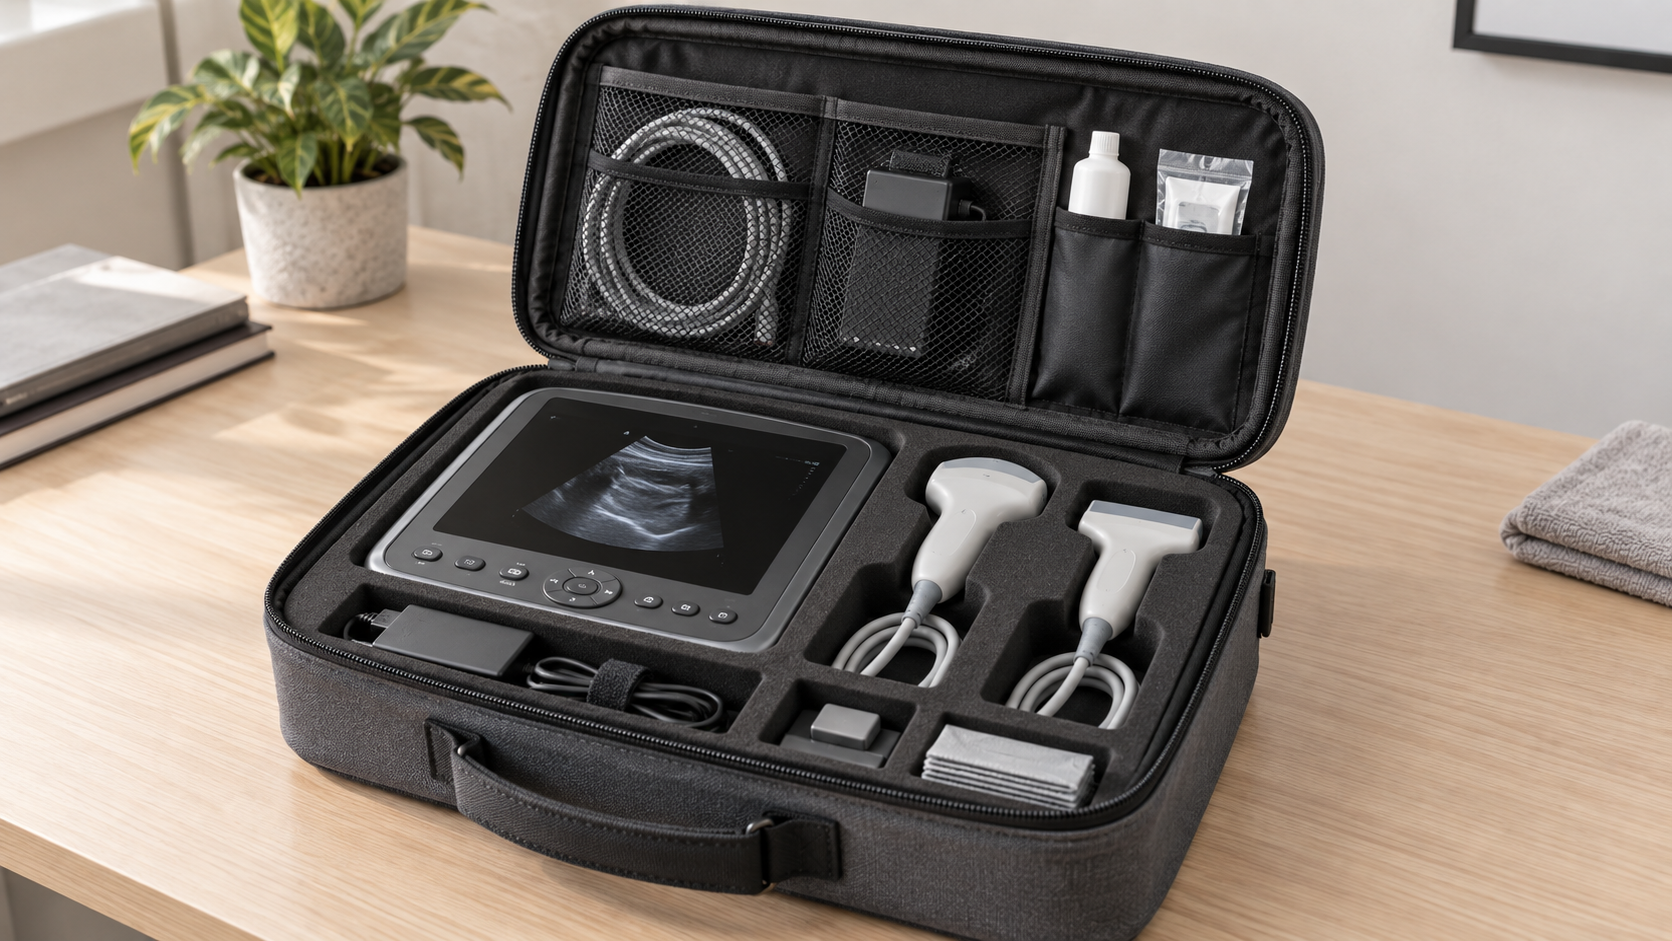
The same equipment can need a different case when the carrying routine changes. Ask who carries it, where it is opened, whether the user needs one-handed access, and which items must be available first.
Write the normal sequence in plain language. For example: place the case on a work surface, open it, remove the probe, connect the cable, take out the main unit, and repack the accessories. The sequence helps the designer decide where the opening, pockets, dividers, and cable paths belong.
Match handle, strap, and closure choices to the carrying task
Describe whether the case is hand-carried, shoulder-carried, placed inside another bag, or moved between a vehicle and a work area. Note how often it is opened and whether the loaded case needs to be held close to the body or set down before access.
Handle, strap, closure, zipper, and hardware choices should be reviewed against the actual project workflow. Avoid a fixed load, comfort, durability, or protection promise unless the project has separate evidence for it. The useful question at this stage is whether the chosen components support the intended handling sequence and can be checked on a sample.
Use a first-sample checklist before approving the case
The first sample is a decision point, not just a visual preview. Review it with the intended equipment and accessories present. If the sample is checked empty, a buyer may miss interference caused by a connector, cable bend, charger, or optional item.
For a more general sample workflow, see Custom EVA Case Sample Approval Checklist. The ultrasound project should add its own device and accessory observations.
Fit and clearance checks
Place the main unit, probes or sensors, cables, charger, and intended accessories in the case. Check whether each item sits in the intended orientation and whether it can be removed along the planned path.
Record tight points, unused volume, contact with connectors, and any part that shifts when the case is moved. If a component is optional, check both the normal and expanded kit when both versions are expected.
Access, closure, and carrying checks
Open and close the case in the same sequence described in the brief. Check the zipper path, opening angle, pocket access, cable routing, handle or strap use, and the movement of the loaded sample during normal carrying.
The review should also record what was not checked. Medical, regulatory, testing, and performance questions need their own evidence and approval. A successful fit review does not prove sterility, compliance, drop performance, waterproofing, or clinical safety.
Buyer checklist for an ultrasound equipment carrying case
| Checklist field | Buyer should provide or confirm | Sample-stage check |
|---|---|---|
| Equipment set | Main unit, probes or sensors, cables, charger, and optional accessories | All intended items are present during fit review |
| Dimensions and protrusions | Actual dimensions, handles, connectors, and removable parts | Interference is recorded and clearance is reviewed |
| Internal organization | Insert, divider, pocket, elastic, or retention approach | Items stay organized without blocking access |
| Opening and access | Opening direction and the order in which items are accessed | Items can be inserted and removed as intended |
| Carrying method | Handle, shoulder strap, or another project-approved method | The carrying workflow is reviewed with the loaded sample |
| Materials and lining | Candidate outer layer, EVA core, foam or lining, zipper, and hardware | Material, appearance, and fit choices match the approved sample |
| Packaging | Individual protection, box, label, or shipping input if applicable | Packaging assumptions remain separate from case performance |
| Open questions | Medical, regulatory, testing, or performance requirements that are not verified | Unresolved items stay marked for project verification |
What Pengtour can support in a custom case project
For a custom protective-case project, Pengtour can review the product dimensions, shape, opening, internal layout, foam, outer and lining materials, zipper, handle, strap, packaging, and sample requirements as project inputs. A physical product, 3D file, drawing, or revised sample may be needed when the fit is complex.
Possible materials and components can include selected outer fabrics, an EVA structural core, lining, foam inserts, pockets, dividers, zippers, handles, straps, and hardware. The final suitability of a material or component depends on the actual project and still needs confirmation.
Exact EVA hardness, density, thickness, material selection, hardware, tooling, sample rounds, packaging size, and final fit are project questions. The same applies to any statement about water resistance, impact reduction, durability, or protection level. This article does not establish medical-grade status, sterility, FDA or CE compliance, clinical safety, testing results, or a fixed protection level.
FAQ for ultrasound equipment case planning
What should an ultrasound equipment carrying case hold?
Start with the main unit, probes or sensors, cables, charger, power accessories, and the items the user expects to carry on a normal trip. Add optional accessories separately so the layout can show what is always required and what changes by project or user.
How do I check whether the case will fit the probes and accessories?
Record the actual dimensions, protrusions, orientation, connector positions, clearance, and removal path for each item. Then review those inputs with a physical product, drawing, 3D file, or another approved sample process. Check the complete kit together rather than checking the main unit alone.
Should the case use fixed inserts or adjustable organization?
The choice depends on device variation, access frequency, movement, and the project requirements. Fixed support may suit a stable kit. Foam or adjustable pockets may be more useful when accessories change or users need faster access. Compare the options with the intended equipment and workflow.
What should be checked on the first sample?
Check fit, clearance, item orientation, access, closure, zipper path, carrying method, movement, and packaging inputs with the complete intended kit. Record anything that was not checked. A sample fit review does not establish medical compliance, sterility, clinical safety, or a laboratory performance result.
Does a carrying case make medical equipment compliant or sterile?
No. A carrying case does not by itself establish compliance, sterility, clinical safety, diagnostic accuracy, or a fixed protection result. Those questions require separate project evidence, specifications, and approvals.
Turn the checklist into a case brief
Before requesting a quote, attach the equipment inventory, dimensions, protrusions, accessory variations, access sequence, carrying method, preferred organization, sample checks, packaging inputs, and unresolved questions. Mark assumptions separately from confirmed requirements.
Custom EVA Case Design Requirements Before Sampling can serve as a broader brief-preparation reference. For a project-specific discussion, you can request a quote from Pengtour with the equipment list and the questions that still need confirmation.